Now that the holidays have passed, it is easier to reflect and write about "Olive Your Cooking-A Godby Family Cookbook, Volume 1."
I always struggle with what to get my dad for Christmas, as he always asks for the same four things:
-Cooking tools
-Certificate to go get a massage
-Golf balls
-A Clive Cussler book
As you can imagine, this gets repetitive year after year. So this year I finally had an epiphany in early November that I could start crafting together a series of Godby Family Cookbooks, and this year would be the first. The book is a great collection of our own recipes, family photos, and memories. Here's a few pages and photos of the book-take a look for yourself! (Sorry for the picture quality-it truly doesn't do it justice.)
Now off to keep cooking for volume 2!
Cooking and baking are two of my true loves. These posts are recipes I've tried and loved, family stories from the kitchen, and all about my attempts at becoming a respectable cook-one ladle at a time.
Tuesday, January 24, 2012
Monday, January 16, 2012
Healthy Recipe Overload and the Story of the Jalapeno Hand Crisis
We've all seen or at least heard of "The Biggest Loser". But if you live under a rock, or are my best friend that lives in Taiwan and is completely detached from any modern day TV references every time that I mention one, the show is about a group of people who compete to lose the most amount of weight through diet and exercise. So, we are competing in a Biggest Loser challenge at work. It's optional, not sponsored by the company, lasts for 8 weeks, and begins today. I'm competing. This week's line-up? Zumba today, Boxing tomorrow, and Hip Hop on Wednesday. Bring it on, competition, because I'm gonna be bustin' a move like this grandma:
That being said, recipes for the next 8 weeks will be mainly gluten-free and healthy because I'm vowing to cut out gluten (minus a couple beers-let's be real here, people...St. Patrick's Day is coming up) and work out like a crazy person.
One thing that I love to eat is Guacamole. It's easy to make, delicious, and if you buy corn chips for dipping, you don't need to worry about gluten! Months ago, I made this guacamole recipe for the first time, and this is how the story of the Jalapeno Hand Crisis came to be.
I was making a pre-dinner appetizer. The guacamole recipe is quite easy to follow-the last thing I did was add the jalapeno. I diced it up, mixed together the ingredients, and threw it into the refrigerator to cool it.
Ten minutes later, I thought I had a paper cut on my pinkie that I had squeezed lime juice into, as it was stinging like crazy. I examined my finger and couldn't find any type of cut, but still tried to locate the source of the pain. Then, the pain traveled from my pinkie to my ring finger. And then to my middle finger. And then to my pointer finger. Before I knew it, my entire hand felt like I was holding it over an open flame. I called my dad and asked him about the jalapeno addition to the recipe. It was at this point that he laughed at me for being stupid enough to cut a jalapeno with my bare hands and told me I would have to stick it out until the pain went away. If any of you have ever made the mistake of cutting a jalapeno with your bare hands, you know that those words bring you no relief.
This is a list of items I attempted to put on my hands, or dip my hands in, in order to take away the pain:
-Butter
-Vaseline
-Nail Polish Remover
-Lemon Juice
-Sour Cream
-Lime Juice
-Hydrogen Peroxide
-Heavy Cream
The only thing that soothed the pain was leaving my hand in a glass of milk, which I proceeded to do, for the next 4 hours. It actually took THAT long for the pain to leave my hand. I read accounts where it lasted 24 hours for some people...so conclusively, WEAR GLOVES WHEN YOU CUT JALAPENOS.
90% of you probably already knew that, but in case you have the intelligence of a pine cone when it comes to cooking with peppers like myself, don't say I didn't warn you.
What you'll need:
-3 Avocados, peeled, seeded, chopped
-1/2 White Onion, chopped finely
-1 Garlic Clove, minced
-1/2 Jalapeno, seeded, chopped finely
-1 Lime, squeezed (2 tsp)
-1/4 cup Cilantro, minced
-Salt and Pepper to taste
Mash the avocado with a fork in a medium sized bowl. Add all the other ingredients and mix. Cool and serve!
That being said, recipes for the next 8 weeks will be mainly gluten-free and healthy because I'm vowing to cut out gluten (minus a couple beers-let's be real here, people...St. Patrick's Day is coming up) and work out like a crazy person.
One thing that I love to eat is Guacamole. It's easy to make, delicious, and if you buy corn chips for dipping, you don't need to worry about gluten! Months ago, I made this guacamole recipe for the first time, and this is how the story of the Jalapeno Hand Crisis came to be.
I was making a pre-dinner appetizer. The guacamole recipe is quite easy to follow-the last thing I did was add the jalapeno. I diced it up, mixed together the ingredients, and threw it into the refrigerator to cool it.
Ten minutes later, I thought I had a paper cut on my pinkie that I had squeezed lime juice into, as it was stinging like crazy. I examined my finger and couldn't find any type of cut, but still tried to locate the source of the pain. Then, the pain traveled from my pinkie to my ring finger. And then to my middle finger. And then to my pointer finger. Before I knew it, my entire hand felt like I was holding it over an open flame. I called my dad and asked him about the jalapeno addition to the recipe. It was at this point that he laughed at me for being stupid enough to cut a jalapeno with my bare hands and told me I would have to stick it out until the pain went away. If any of you have ever made the mistake of cutting a jalapeno with your bare hands, you know that those words bring you no relief.
This is a list of items I attempted to put on my hands, or dip my hands in, in order to take away the pain:
-Butter
-Vaseline
-Nail Polish Remover
-Lemon Juice
-Sour Cream
-Lime Juice
-Hydrogen Peroxide
-Heavy Cream
The only thing that soothed the pain was leaving my hand in a glass of milk, which I proceeded to do, for the next 4 hours. It actually took THAT long for the pain to leave my hand. I read accounts where it lasted 24 hours for some people...so conclusively, WEAR GLOVES WHEN YOU CUT JALAPENOS.
90% of you probably already knew that, but in case you have the intelligence of a pine cone when it comes to cooking with peppers like myself, don't say I didn't warn you.
What you'll need:
-3 Avocados, peeled, seeded, chopped
-1/2 White Onion, chopped finely
-1 Garlic Clove, minced
-1/2 Jalapeno, seeded, chopped finely
-1 Lime, squeezed (2 tsp)
-1/4 cup Cilantro, minced
-Salt and Pepper to taste
Mash the avocado with a fork in a medium sized bowl. Add all the other ingredients and mix. Cool and serve!
Friday, January 13, 2012
Reese's...the Cupcake Kind
I have recently become a bit of a Cupcake Queen, to the point where I am finally starting to understand the science of what goes into making a great cupcake. I've been going back and forth about whether or not to post these recipes, as this blog is mainly about cooking, but I've decided to roll with it and add the baking, plus all things food-related. Deal with it.
That being said, I made the most bangin' cupcakes last night! Chocolate cupcakes with a Peanut Butter Cream Cheese frosting, topped with Reese's Peanut Butter Cups. Oh yes.
What you'll need:
(Chocolate Cupcakes)
-2 cups Sugar
-1 3/4 cups All Purpose Flour
-3/4 cup Unsweetened Cocoa
-1 1/2 tsp Baking Powder
-1 1/2 tsp Baking Soda
-1 tsp Salt
-2 Eggs
-1 cup Whole Milk
-1/2 cup Vegetable Oil
-2 tsp Vanilla Extract
-1 cup Boiling Water
What you'll need:
(Peanut Butter Cream Cheese Frosting-http://www.yourcupofcake.com/2010/11/peanut-butter-and-banana-cupcakes.html)
-8 oz. Cream Cheese
-4 tbsp Butter, softened
-1/2 cup creamy Peanut Butter
-3 cups powdered Confectioner's Sugar
-1/4 cup Heavy Cream
-Reese's mini Peanut Butter Cups
Preheat your oven to 350 degrees. In a large mixing bowl, combine the Sugar, Flour, Cocoa, Baking Powder, Baking Soda, and Salt. Add the Eggs, Milk, and Vanilla, and beat on medium speed for 1-2 mins. Stir in the boiling water.
It is important to note that at this point, your batter will look very watery. DO NOT PANIC. It's supposed to look like this. I poured my batter into a measuring cup with a spout so I could easily pour it into the cupcake liners. Fill 24 cupcake liners about 2/3 full with the batter. Bake at 350 for about 20-25 mins, or until a toothpick comes out clean.
While your cupcakes are baking, you can get started on your frosting. Beat the cream cheese and butter together until mixed well. Add the peanut butter and let it sit for 2 mins. Add the Confectioner's Sugar and Heavy Cream and beat well until smooth and light.
That being said, I made the most bangin' cupcakes last night! Chocolate cupcakes with a Peanut Butter Cream Cheese frosting, topped with Reese's Peanut Butter Cups. Oh yes.
What you'll need:
(Chocolate Cupcakes)
-2 cups Sugar
-1 3/4 cups All Purpose Flour
-3/4 cup Unsweetened Cocoa
-1 1/2 tsp Baking Powder
-1 1/2 tsp Baking Soda
-1 tsp Salt
-2 Eggs
-1 cup Whole Milk
-1/2 cup Vegetable Oil
-2 tsp Vanilla Extract
-1 cup Boiling Water
What you'll need:
(Peanut Butter Cream Cheese Frosting-http://www.yourcupofcake.com/2010/11/peanut-butter-and-banana-cupcakes.html)
-8 oz. Cream Cheese
-4 tbsp Butter, softened
-1/2 cup creamy Peanut Butter
-3 cups powdered Confectioner's Sugar
-1/4 cup Heavy Cream
-Reese's mini Peanut Butter Cups
Preheat your oven to 350 degrees. In a large mixing bowl, combine the Sugar, Flour, Cocoa, Baking Powder, Baking Soda, and Salt. Add the Eggs, Milk, and Vanilla, and beat on medium speed for 1-2 mins. Stir in the boiling water.
It is important to note that at this point, your batter will look very watery. DO NOT PANIC. It's supposed to look like this. I poured my batter into a measuring cup with a spout so I could easily pour it into the cupcake liners. Fill 24 cupcake liners about 2/3 full with the batter. Bake at 350 for about 20-25 mins, or until a toothpick comes out clean.
While your cupcakes are baking, you can get started on your frosting. Beat the cream cheese and butter together until mixed well. Add the peanut butter and let it sit for 2 mins. Add the Confectioner's Sugar and Heavy Cream and beat well until smooth and light.
Once your cupcakes have cooled, ice each, top with Reese's Peanut Butter Cups, and serve. These were an absolute hit in my office-gone by lunch time!
Wednesday, January 11, 2012
Bruschetta Chicken with Cucumber Salad
Happy New Year!
As we roll into the new year, you're probably one of the hundreds of people flooding the gym this week, with aspirations that this is going to be the year they finally get their high school body back! Let's be real. This lasts about 2 weeks, maybe 4 if you're lucky, and then the early onset of Valentine's Day candy sends you plummeting right back to your acceptance of being a fat kid for life. But while you're on a temporary resolution high, try out this healthy and easy-to-make meal.
What you'll need (Bruschetta Chicken):
-4 Boneless, Skinless Chicken Breasts
-2 Plum Tomatoes, finely chopped
-1/2 cup shredded Mozzarella Cheese
-1/4 cup freshly chopped Basil
-Balsamic Vinegar
-Extra Virgin Olive Oil
-Salt and Pepper
What you'll need (Cucumber Salad):
-1/2 cup Sour Cream
-2 tablespoons fresh Lemon Juice
-2 tablespoons chopped, fresh Dill
-4 Cucumbers
-Salt and Pepper
Clean your chicken breasts and coat with a dash of salt and pepper. Grill the breasts on a medium temperature until they are cooked all the way through.
While your chicken is cooking, combine the tomatoes, cheese, and basil in a small bowl. Add Balsamic Vinegar and Olive Oil to taste, almost 1/4 cup. Add Salt and Pepper to taste. This will be the topping for your chicken.
Now you can get started on your Cucumber Salad. Whisk together the Sour Cream, Lemon Juice, and Dill. Add the cucumbers and toss to coat. Add Salt and Pepper to taste and toss to coat.
By now, your chicken should be grilled all the way through. Add the Bruschetta topping to your chicken and serve!
As we roll into the new year, you're probably one of the hundreds of people flooding the gym this week, with aspirations that this is going to be the year they finally get their high school body back! Let's be real. This lasts about 2 weeks, maybe 4 if you're lucky, and then the early onset of Valentine's Day candy sends you plummeting right back to your acceptance of being a fat kid for life. But while you're on a temporary resolution high, try out this healthy and easy-to-make meal.
What you'll need (Bruschetta Chicken):
-4 Boneless, Skinless Chicken Breasts
-2 Plum Tomatoes, finely chopped
-1/2 cup shredded Mozzarella Cheese
-1/4 cup freshly chopped Basil
-Balsamic Vinegar
-Extra Virgin Olive Oil
-Salt and Pepper
What you'll need (Cucumber Salad):
-1/2 cup Sour Cream
-2 tablespoons fresh Lemon Juice
-2 tablespoons chopped, fresh Dill
-4 Cucumbers
-Salt and Pepper
Clean your chicken breasts and coat with a dash of salt and pepper. Grill the breasts on a medium temperature until they are cooked all the way through.
While your chicken is cooking, combine the tomatoes, cheese, and basil in a small bowl. Add Balsamic Vinegar and Olive Oil to taste, almost 1/4 cup. Add Salt and Pepper to taste. This will be the topping for your chicken.
Now you can get started on your Cucumber Salad. Whisk together the Sour Cream, Lemon Juice, and Dill. Add the cucumbers and toss to coat. Add Salt and Pepper to taste and toss to coat.
By now, your chicken should be grilled all the way through. Add the Bruschetta topping to your chicken and serve!
Friday, August 26, 2011
Chicken Sriracha Surprise
So, I have attempted recently to be a bit more on the healthy side, but there's only so many days I can eat chicken breast in a row before wanting to run right back to the happy land of pasta. Chicken parm, chicken with asparagus, chicken marsala....over, and over, and over again. Not to mention, the chicken breast is the hardest to cook. Those of you who are thinking that chicken is by far the easiest thing to cook-hear me out: there's a special in between that you have to reach to get it just perfect...typically, I end up screwing this up and having very dry chicken. Yeah, I'm bad at the chicken breast thing.
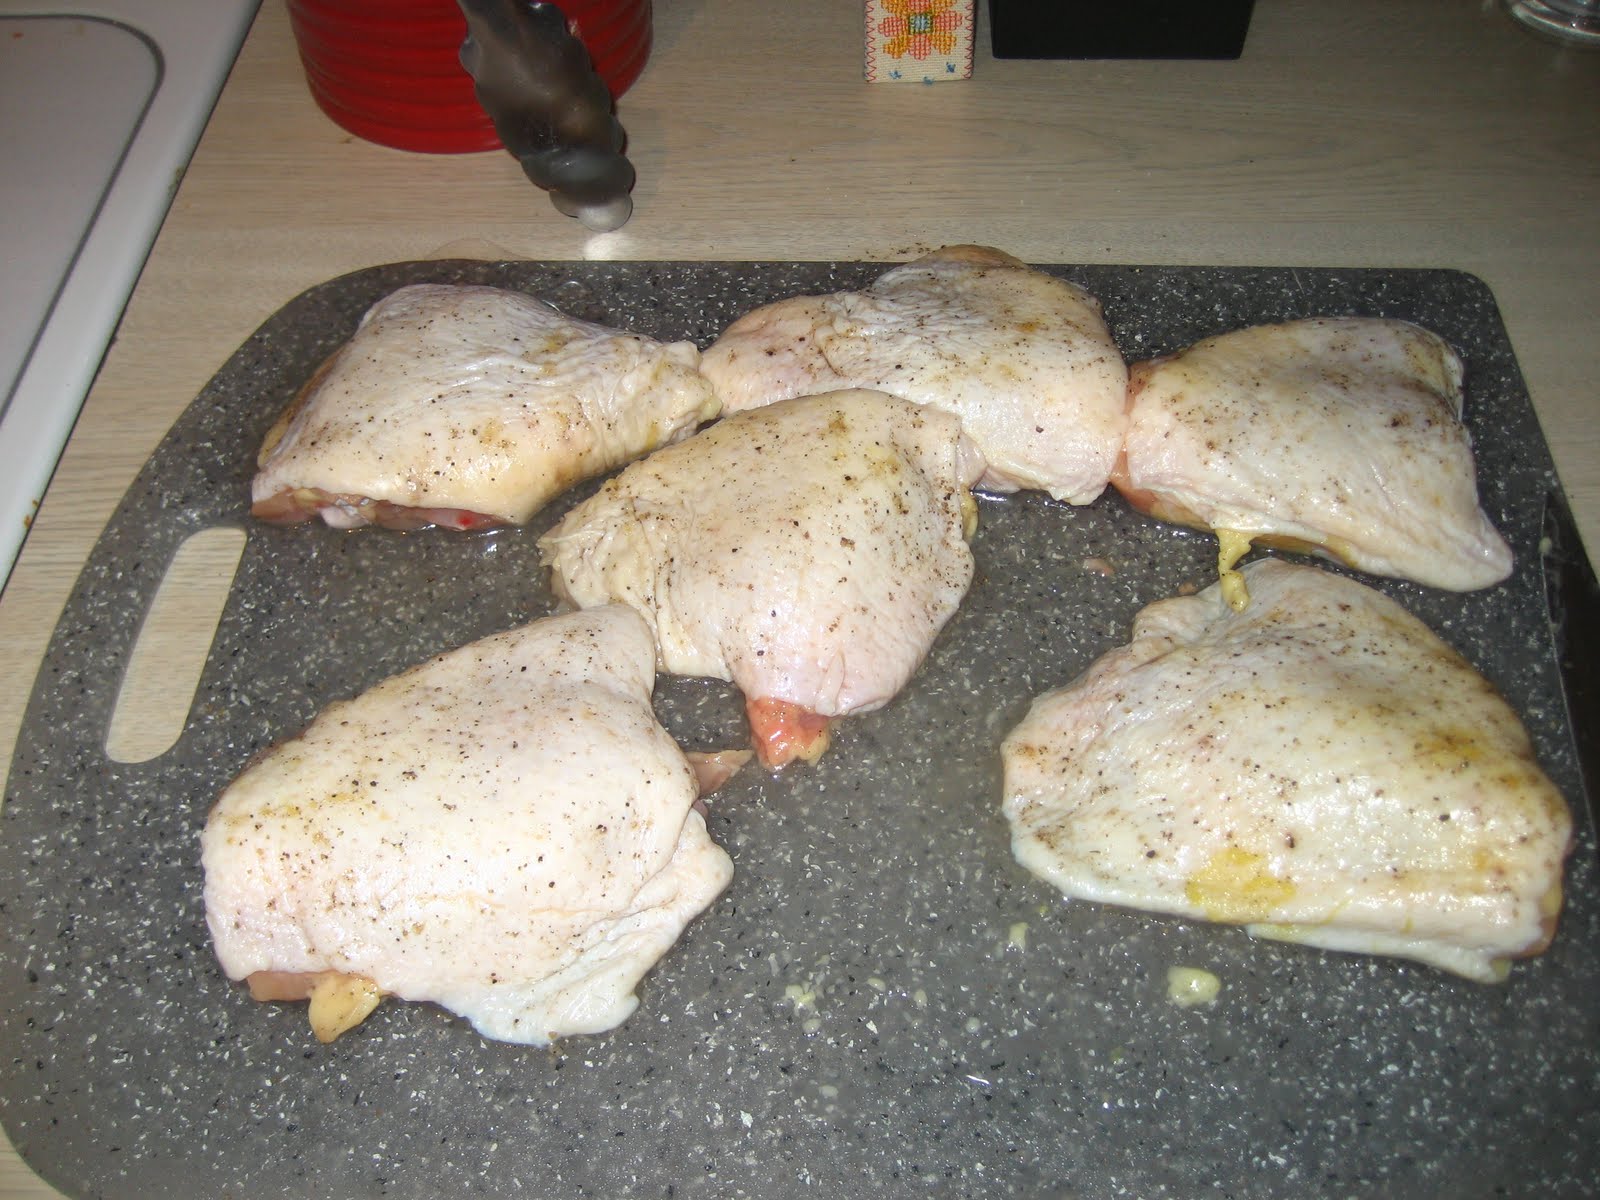
After all this boredom and carb cravings, I came across this great recipe for pan roasted chicken that blew my mind with it's simplicity and tastiness. I am here to share this with you, as well as a pretty awesome cucumber, tomato, and feta salad:
What you'll need (chicken thighs):
-6 skin-on, bone-in Chicken Thighs (about 2 and 1/4 pounds)
-Salt and Pepper
-1 tbsp Vegetable Oil
What you'll need (thigh glaze):
-2 tbsp Drippings from the skillet of chicken (once completely cooked)
-1 tbsp Sriracha
-2 tbsp Brown Sugar
-1 tbsp Minced Cilantro
-2 tbsp Brown Sugar
-1 tbsp Minced Cilantro
-Half a Lime
What you'll need (salad):
-6 cups coarsely chopped Cucumbers
-2 large Tomatoes, coarsely chopped
-1 bunch Scallions, chopped
-1 7 oz. package Feta, crumbled
-1/2 cup coarsely chopped fresh Mint
-6 tbsp extra virgin Olive Oil
-1/4 cup fresh Lemon juice
-Salt and Pepper
Preheat your oven to 475 degrees. Begin by cleaning your chicken and then seasoning it with salt and pepper, making sure to cover the whole surface.
Heat the vegetable oil in a cast-iron or nonstick skillet over high heat until hot but not smoking. Place the chicken into the skillet, skin side down, and cook for 2 minutes.
Lower the heat to medium heat and continue cooking skin side down. Rotate the chicken clockwise in pan to evenly distribute heat, until fat renders and skin is golden brown, about 12 minutes.
Heat the vegetable oil in a cast-iron or nonstick skillet over high heat until hot but not smoking. Place the chicken into the skillet, skin side down, and cook for 2 minutes.
Lower the heat to medium heat and continue cooking skin side down. Rotate the chicken clockwise in pan to evenly distribute heat, until fat renders and skin is golden brown, about 12 minutes.
Transfer the skillet to the oven and cook for 13 more minutes. Flip the chicken and continue cooking until the skin is crispy and the meat is cooked through, about 5 minutes longer.
While you are cooking your chicken, you can prepare your salad. Combine the cucumbers, tomatoes, scallions, half of the feta, and mint into a large salad bowl. The oil and lemon juice will make up your dressing-grab a small bowl or tupperware and whisk the oil and lemon juice together; season the dressing with salt and pepper. Pour the dressing over the salad and toss to coat; add a little more salt and pepper to taste. Sprinkle the remaining feta over the salad.
| Terrible lighting, but delicious salad! :o) |
You should now be ready to extract the chicken from the oven and transfer to a plate.
Wednesday, May 18, 2011
Comfort Food
Who doesn't love a good bowl of hot macaroni and cheese? Ahh, comfort food.
I wasn't allowed to eat that "Kraft crap" as my dad called it, but he sure did make a damn good version of his macaroni and cheese. It put Kraft and Velveeta to shame....then again, so do most homemade mac and cheese recipes.
I went through a large Velveeta phase in college with my roommate, Amy. We would stock up on boxes of "Velveets" as we called it, and house it every time we had a few too many drinks in us. We were also poor college students and could only afford 99 cent Velveeta. If you ever had Velveeta, then you know that the grossest thing is the cheese mixture they give you. That prepackaged, gooey cheese mixture:
EW. Like, what is in that?! It was nauseating as you squeezed it out, but we added a little bit of pepper to it to make it seem a bit more legit. There were actually times that I made the Velveeta and then couldn't eat it because I became too overwhelmed by the thought of the production process of the cheese package.
So, it's time to skip out on 99 cent boxes, and spend a few more bucks to make a dish that is not only more delightful, but easy to make.
What you'll need:
-8 oz. Elbow Macaroni
-2 tablespoons Butter
-8 oz. of graded Sharp Cheddar Cheese, shredded
-2 cups Milk
-2 tablespoons Flour
-1/2 teaspoon Salt
-1/2 teaspoon Ground Pepper
-1/2 teaspoon Crushed Red Pepper
Preheat your oven to 400 degrees. Prepare the Macaroni as you normally would or as the package instructions say.
While you're cooking your macaroni, in medium to low heat, melt the butter in a somewhat large sauce pan. Once the butter is melted, begin to pour in the flour, whisking constantly. Whisk for about 2 minutes, until the liquid is smooth. Again, whisking constantly, add the milk and continue to cook for five minutes until your mixture has thickened. Remove the saucepan from heat and add in the salt, black and red pepper, and 1 cup of your shredded cheese. I was out of red pepper so I added the TINIEST pinch of cayenne pepper to give it a kick. Then add the cooked macaroni and mix together.
Spoon your mixture into a 2 quart baking dish; sprinkle on the additional cheese and bake at 400 degrees for 20 minutes. I baked it for 18 minutes and then broiled it for the remaining two minutes as I like to have it be a little crispy on top! Let it sit for a few minutes and then it's ready to serve! Yum!
I wasn't allowed to eat that "Kraft crap" as my dad called it, but he sure did make a damn good version of his macaroni and cheese. It put Kraft and Velveeta to shame....then again, so do most homemade mac and cheese recipes.
I went through a large Velveeta phase in college with my roommate, Amy. We would stock up on boxes of "Velveets" as we called it, and house it every time we had a few too many drinks in us. We were also poor college students and could only afford 99 cent Velveeta. If you ever had Velveeta, then you know that the grossest thing is the cheese mixture they give you. That prepackaged, gooey cheese mixture:
EW. Like, what is in that?! It was nauseating as you squeezed it out, but we added a little bit of pepper to it to make it seem a bit more legit. There were actually times that I made the Velveeta and then couldn't eat it because I became too overwhelmed by the thought of the production process of the cheese package.
So, it's time to skip out on 99 cent boxes, and spend a few more bucks to make a dish that is not only more delightful, but easy to make.
What you'll need:
-8 oz. Elbow Macaroni
-2 tablespoons Butter
-8 oz. of graded Sharp Cheddar Cheese, shredded
-2 cups Milk
-2 tablespoons Flour
-1/2 teaspoon Salt
-1/2 teaspoon Ground Pepper
-1/2 teaspoon Crushed Red Pepper
Preheat your oven to 400 degrees. Prepare the Macaroni as you normally would or as the package instructions say.
While you're cooking your macaroni, in medium to low heat, melt the butter in a somewhat large sauce pan. Once the butter is melted, begin to pour in the flour, whisking constantly. Whisk for about 2 minutes, until the liquid is smooth. Again, whisking constantly, add the milk and continue to cook for five minutes until your mixture has thickened. Remove the saucepan from heat and add in the salt, black and red pepper, and 1 cup of your shredded cheese. I was out of red pepper so I added the TINIEST pinch of cayenne pepper to give it a kick. Then add the cooked macaroni and mix together.
Spoon your mixture into a 2 quart baking dish; sprinkle on the additional cheese and bake at 400 degrees for 20 minutes. I baked it for 18 minutes and then broiled it for the remaining two minutes as I like to have it be a little crispy on top! Let it sit for a few minutes and then it's ready to serve! Yum!
| http://s4.hubimg.com/u/72967_f520.jpg |
Monday, April 11, 2011
National Harbor 2011 Wine & Food Festival
So I know my traditional blog posts are about recipes and past stories paralleling them, but I figured this blog could also be a way to share events, shows, articles, anything really obtaining to the food industry and those of you who are interested in culinary art.
If you live in the DC/NOVA area, you might want to check out the National Harbor's 2011 Wine & Food Festival. This is my first year attending so I don't know what to expect, but I've been to an event before in the same location put on by the same agency and it was run very well and lots of fun!
So what can you expect to do/see at this event? Here's a little run down of what I got off the site:
-It's an all you can taste event. You pay $35 if you buy your tickets in advance online...so with that you get a complimentary glass that you can take to every tent and taste.
-Live Music. Enough said. You really can't go wrong with this. It also says "entertainers"...I'm not sure what exactly this means...
-Chefs from all over-these means local or famous....it sounds like they're doing meet and greets, but I'm really hoping they'll do some demos as well
All in all, it sounds like a pretty sweet event and I will definitely be in attendance! There's also a lot of places to eat and hotels to stay in surrounding the harbor, so if you're planning on using your complimentary glass to it's fullest, I recommend checking those out ;o).
Here's the site for more information:
http://www.wineandfoodnh.com/
If you live in the DC/NOVA area, you might want to check out the National Harbor's 2011 Wine & Food Festival. This is my first year attending so I don't know what to expect, but I've been to an event before in the same location put on by the same agency and it was run very well and lots of fun!
So what can you expect to do/see at this event? Here's a little run down of what I got off the site:
-It's an all you can taste event. You pay $35 if you buy your tickets in advance online...so with that you get a complimentary glass that you can take to every tent and taste.
-Live Music. Enough said. You really can't go wrong with this. It also says "entertainers"...I'm not sure what exactly this means...
-Chefs from all over-these means local or famous....it sounds like they're doing meet and greets, but I'm really hoping they'll do some demos as well
All in all, it sounds like a pretty sweet event and I will definitely be in attendance! There's also a lot of places to eat and hotels to stay in surrounding the harbor, so if you're planning on using your complimentary glass to it's fullest, I recommend checking those out ;o).
Here's the site for more information:
http://www.wineandfoodnh.com/
Subscribe to:
Posts (Atom)